

How To Programmatically Add A Segmented Controller Swift
How to Make a Tab Bar Controller in Swift iii.0 Code
While Navigation controllers often accept the limelight when it comes to Xcode's view controllers, tab bar controllers are better for independent tasks in the same app, or for different ways of working with the same model. In this lesson nosotros'll have a look at how to make them in Swift programmatically. If yous are interested in tab bar controllers on the storyboard, You might want to read this post. For passing data between tabs read hither.
Setting Up
While in that location are very easy storyboard ways of making tab bar controllers, we can do much of this programmatically. Commencement with a single view template and create a Swift project called TabProgDemo. Once the project loads, on the keyboard hit Command-N. Create a Cocoa Touch Class namedPizzaViewController, subclassing of UIViewController.Make the linguistic communication Swift, and cheque the mark to make a Xib file for an iPhone like this:

Printing Command-North again and Make some other Cocoa Touch Class similar the first, subclassing UIViewController. Proper noun information technologyPieViewController again creating a XIB file.

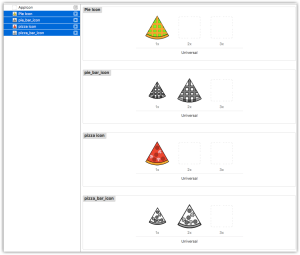
I have created a file of image avails for this lesson. You can get them here as a zip file or you can correct click and save the images below:
![]()
![]()

![]()

![]()
Save these images on your drive. Open up up your Assets.xcassets folder in Xcode. Select all the files in finder and elevate them into the assets binder.
Get to the the PieViewController.xibfile. Make sure in the lower left of Interface builder information technology reads the default setting:

If, not prepare it to iPhone 6s by clicking it and selecting the device. Set the background colour to Calorie-free Dark-green(#AAFFAA). Drag out a label and title information technology Pie at 32 points. Add together the color Pie Icon. Your XIB should look like this:

Select the PizzaViewController.xib file. Gear up the Xib the same mode as the pie controller. Use a Light Blood-red(#FFAAAA) for the groundwork:

Tab Bar Programmatically
Click open up the AppDelegate.swift file. While much of this can exist important stuff, we'll clear it out so we tin can concentrate on tab bar controllers. Replace the course with the following:
class AppDelegate: UIResponder, UIApplicationDelegate { var window: UIWindow? func awarding(awarding: UIApplication, didFinishLaunchingWithOptions launchOptions: [NSObject: AnyObject]?) -> Bool { render true } } Allow'due south put this code together part by part. First add together this under the function announcement:
let tabBarController = UITabBarController()
Creates an instance of a UITabBarController. This volition be the controller we'll configure in this office. Nosotros are doing this here so it is global to the awarding, one of the few times you desire to practice something globally.
Create the two view controllers from the XIB files. In full accordance with the adage "Life is uncertain, eat dessert beginning", nosotros'll make the outset page on launch be the pie page.
let tabViewController1 = PieViewController( nibName: "PieViewController", bundle: nil) allow tabViewController2 = PizzaViewController( nibName:"PizzaViewController", packet: nil)
Add together these three lines:
permit controllers = [tabViewController1,tabViewController2] tabBarController.viewControllers = controllers window?.rootViewController = tabBarController
UITabBarController has a property called viewControllers, which is an array of the view controllers in the gild displayed in the tab bar. Our outset line of this segment makes an array of view controllers in the gild we want them to present. Side by side we assign the array to the tab bar controller. The terminal line assigns the controller as the root view controller.
Nosotros have our controller set up, but no titles or icons. This code assigns the title and image.
tabViewController1.tabBarItem = UITabBarItem( title: "Pie", image: UIImage(named: "pie_bar_icon"), tag: 1) tabViewController2.tabBarItem = UITabBarItem( title: "Pizza", paradigm:UIImage(named: "pizza_bar_icon") , tag:2)
Each view controller has a property tabBarItem which contains the icon and text for the tab bar. Nosotros employ the UITabBarItem(title:String,image:UIImage,tag:Int) initializer to create the tab bar items. In our instance, we ready the offset ane to Pie and apply the pie_bar_icon image for the first. The 2nd uses Pizza and the pizza_bar_icon epitome.
Gear up your simulator to the iPhone 6s. Build and run. You get the Pie first:

You'll observe the tabs the bottom. Tap the pizza tab.

You have working tabs.

How To Programmatically Add A Segmented Controller Swift,
Source: https://makeapppie.com/2016/07/14/how-to-make-a-tab-bar-controller-in-swift-3-0-code/
Posted by: torrestheivein.blogspot.com
0 Response to "How To Programmatically Add A Segmented Controller Swift"
Post a Comment